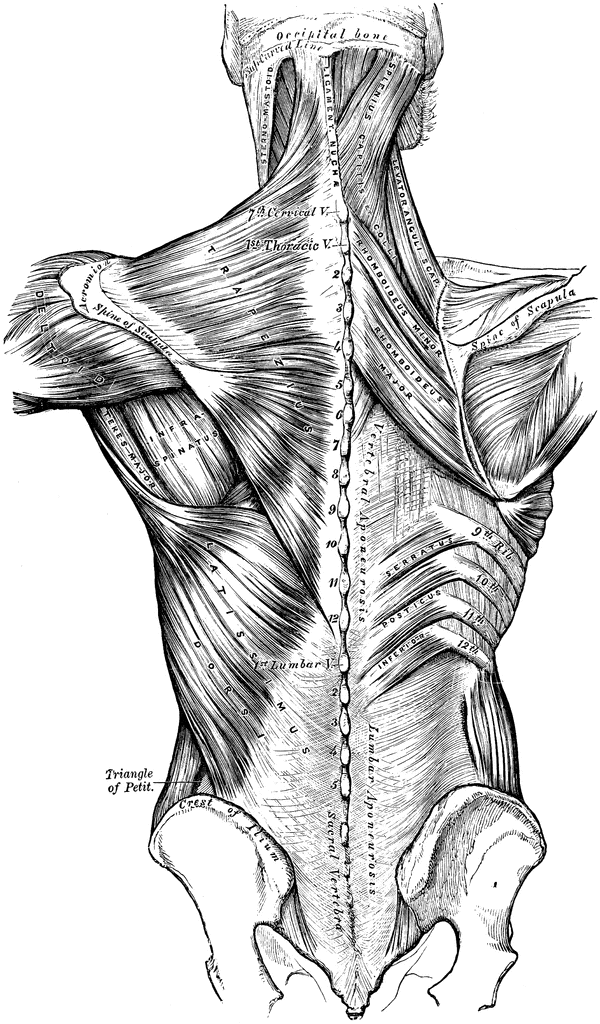
We all have problem areas, regions of our body that are starting to push back against the miles of physical activity or conversely years of inactivity. Whatever the case, these areas, that were once pain-free, are now angry. The upper back and neck is one of those spots for many people. This problem area covers from the base of the skull, fans out to the shoulders and extends down to the upper-back and shoulder blades.
For neck pain, I don’t usually strengthen the neck directly and when I do stretch my neck musculature, I am very gentle with it. My preferred approach is to focus on the rib cage and shoulder girdle, as this is the foundation upon which the neck sits. In fact, when you look left, right, up or down, your upper thoracic vertebrae must move if you are to achieve full neck range of motion. I am not dismissing working directly on the neck, but if you have persistent neck pain, try giving the upper back some attention.
Below are a few exercises I do myself and regularly advise my patients to do. Try them all or just the one that is specific to your needs. I have tried to list them in the semblance of a protocol, but you do not have to do them sequentially. That said, if you find one is too difficult or exacerbates your issues, try the preceding exercise.
Exercises
Foam Roll Ribcage in Side-lying
-Lay on your side over a foam roller.
-Position the foam roller about 3-4 inches below your armpit.
-Inhale, feeling the upper, front and back of the ribcage expand and reaching overhead.
-Exhale, sinking onto the side-bending over the foam roller.
-Spend 2-3 minutes per side with deep and slow nasal inhales and nasal exhales.
Why this works:
With one side of the ribcage prevented from moving, this reduces the volume of your thorax forcing the other areas of the ribcage to expand with inhalation. This stretches and reduces tension in the muscles between your ribs and along your vertebrae. The reduced muscle tension restores the proper position of your natural spinal curvature and the mobility to your ribcage.
Resisted External Rotation at 90 degrees of Shoulder Flexion
-In a seated position, place elbows on a table 3-4 inches apart
-With a resistance band and palms facing you, pull your hands apart and hold.
-Lift your elbows off the table or not.
-Begin breathing with slow nasal inhales and exhales.
-Focus on the expansion of your posterior ribcage.
-Try a 2-3 sets of 1 minute of deep and slow nasal inhales and nasal exhales.
Why this works:
By positioning and holding your arms in front of your body, your thoracic spine will compensate by flexing or rounding. Additionally, your shoulder blades will move to the outside of your posterior rib wall allowing for expansion of the posterior ribs with inhalation. This allow for the stretching and relief of tension in the posterior ribcage and vertebral musculature.
Dead Hang
-Grab a pull up bar
-Hold some tension in you shoulders to test you capacity for this exercise.
-Slowly release the tension in your shoulders. You should feel a stretch in the latissimus dorsi (under the armpit and/or side of shoulder blades), and/or the pectoralis major and minor(chest). If you feel shoulder pain, best to hold off on this exercise.
-Start with a 15 second hang. If no pain, progress up to a minute.
-While hanging, take deep slow nasal inhales and exhales focusing on expanding your anterior chest wall.
Why this works:
Hanging stretches the anterior chest wall musculature, pulling the anterior ribs up into an inhaled position. The deep inhales further stretch the muscles between the ribs. The latissimus dorsi stretch also helps with shoulder blade positioning for those of you with forward/rounded shoulders.
90/90 Snow Angels
-Lay on the ground with knees and hips bent at 90 degrees, your lower legs supported.
-Begin with a slow nasal inhale, followed by a slow nasal exhale.
-Upon exhaling, use your abdominals to push the air out of your lungs, depressing your lower ribs. Gently maintain your gentle abdominal contraction to hold your ribs in this position throughout the motion.
-Begin with your arms flat next to you, palms facing up.
-Slowly bend your elbows, lifting your arms up off the ground, bringing your forearms together in front of you, palms now facing the floor.
-Slowly extend your shoulders overhead, keeping your forearms touching as long as possible.
-As your forearms separate, turn your palms together, then facing the ceiling as your extend and straighten your arms overhead.
-Once overhead, keep the elbows straight as your lower your arms back to your side, sliding them along the ground.
-This is meant to be a slow and continuous movement throughout.
Why this works:
This motion improves your overhead range of motion as it improves the interaction of your shoulder blades, rib-cage and mid-thoracic spine. The supine position with your elevated legs allows for better control of your lower ribs and lumbar spine, disassociating ribcage elevation and low back extension with overhead shoulder movement. Bringing your forearms together as you begin your reach overhead flexes the mid-thoracic spine, putting your shoulder blades in a better position for overhead movements.
Overhead Press with Cervical Rotation
-Inhale down looking at weight.
-Exhale up looking away from the weight.
Why this works:
Positioning the cervical spine optimally relative to shoulder position, while breathing, allows for expansion of the upper ribcage. Ribcage expansion in this context puts the shoulder blade in the best possible position both at the top and bottom of this motion. With muscles of the cervical spine and shoulder in their proper length tension relationship the joints involved will express their full available range of motion, relieving tension and pain throughout the area.


